It looks strange and the instructions are even stranger, but they have a purpose, and I will tell you in the end.
It's marvelous! Chocolatey, melty, and just ever-so-slightly crisp on the top.
Ingredients
1 stick (1/2 cup) of salted butter
2 3/4 cups sugar (divided into 1 1/4 cups and 1 1/2 cups)
1 3/4 tablespoons and 1/3 cup of cocoa
1 1/2 cups self-rising flour
3/4 cup milk
1 teaspoon vanilla
2 1/4 cups boiling water
Vanilla ice cream
Other things you might need
mixing bowl
measuring cups/spoons
large spoon or spatula [I persist: spatulas are awesome!]
small pot
13x9 inch pan
Directions
1
Pre-heat oven to 350, put your butter in your pan, and stick it in the oven to melt.
 | |
| Yes, I even took a picture of this xD |
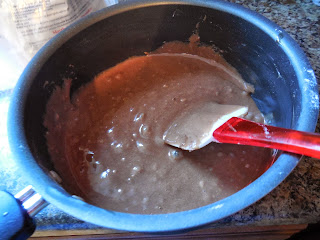
Mix together 1 1/4 cups of sugar, 1 3/4 tablespoons of cocoa, flour, milk, and vanilla until thoroughly combined.
 |
| So, I was in Tennessee in a house I haven't completely moved into, hence the mixing in a frying pan xD |
3
Personally, I had a pot that couldn't heat over medium, so it took quite a while, but even on high it takes a bit for your water to start boiling. Therefore, I suggest putting your 2 1/4 cups of water on the stove to boil right now.
4
Take out your melted butter, and, in spoonfuls, drop your flour mixture onto the butter. The butter will seep through in places, but that is alright. In the end, it will look something like:
5
Ok, now, mix together that 1 1/2 cups of sugar and 1/3 cup of cocoa until it looks something like this:
6
Sprinkle it on top of the butter and flour mixture in the pan. You might want to smooth it out a little afterwards, but it doesn't particularly matter.
7
Now, this is the especially odd part, but it isn't as tricky as you think. Your water boiling? Good, now poor it on top, as quickly and evenly as possible. It will have bubbles all over, but don't worry, that was just because it was boiling.
8
Now put it in the oven and bake for 40-45 minutes. There isn't a particular test to see if it is done, but as long as you cook it long enough, it will be fine. I know it looks odd [personally, I thought it kind of looked like chocolate brains xD], but it tastes so much better, and it doesn't look like brains after you cut into it. :P
9
This last step isn't exactly a step, except that you have to wait at least fifteen minutes before serving, and you should most definitely serve it with vanilla ice cream because it looks beautiful and goes amazingly with it. :]
The fun part is cutting into it and realizing that you have your very own bog of chocolate underneath with which you can drizzle on top of your ice cream and dessert.
 |
This time, I remembered to take a picture of the delectable cascading chocolate and slightly melting ice cream. Seriously, it tastes as good as it looks.
Enjoy! :]


